
The beauty of this dish is that you can make it using any meat you like. Traditionally, Russians use pork to make “otbivniye.” However, I often use chicken, and the end result is just as tasty! What I like about this dish is its “usability.” Nobody makes “otbivniye” for one meal only. If you make 15-20 “otbivniye,” you have your meals figured out for several days! (That is to say if you and your friends/family have any left overs left!)
You can serve the “otbivniye” hot or cold. It’s great on a piece of rye bread with a bit of mustered (I personally prefer Russian style mustered, it’s spicier). You can easily heat them up on a stove or in a microwave. You can serve the pork chops Russian style with mashed potatoes, rice, macaroni, vegetables, salads (Russian Olivie salad or Vinegret salad would work beautifully here), or any other side dish you like.
You will need a tenderizer to make this dish. I’ve used wooden kinds before, and I highly recommend using the metal ones. They are much easier to clean afterwords. So, let’s start cooking!
Ingredients:
4 boneless pork chops or chicken breasts
3 eggs
1/2 cup flour
4-6 cloves of garlic
stt – salt to taste
ptt – pepper to taste
dill or/and parsley
olive, vegetable, or canola oil

Step 1: Slice each boneless pork chop/chicken breast into 3 slices. Some pork chops/chicken breasts are quite thick, so I manage to slice them into 4 slices.
Step 2: Tenderize each slice well on each side.
Step 3: Chop your garlic finely, or use a garlic press. Chop the parsley/dill.
Step 4: Rub the garlic and the parsley/dill into each slice. I use garlic generously, but if you are not a big fan of this spice, then you should reduce the amount or eliminate it (that is if you don’t like the spice at all). Salt and pepper each slice to your liking. Keep in mind, you can always add more salt after the meat is cooked, but you won’t be able to take the salt out if you use too much of it.
Note 1: You can start cooking the “otbivniye” as soon as you are done with the spices. However, I prefer to let the meat marinate for a couple of hours and let it absorb all the wonderful garlic and parsley/dill flavors before I start cooking it. Also, I stack the pork or chicken slices (as shown on the picture above) for marinating purposes.
Note 2: “Otbivniye” is a great dish to make if you are planning to have guests over, because you can do all the prep work (Step 1 – Step 4) the day before. Just put the stacked slices in your refrigerator, let them marinate overnight, and finish cooking “otbivniye” the next day!
Step 5: Once you are ready to pan fry the marinated slices, crack open 3 eggs into a bowl, and then beat the eggs with a fork. You can add a pinch of salt and/or pepper to the eggs.
Step 6: Pour 1/2 cup of flour onto a plate.
Step 7: Heat your frying pan. Once it’s heated, pour 2 Tsp of oil into the frying pan.
Step 8: Take one marinated slice of pork/chicken, flour it on both sides, shake off the extra flour, and then dip it into the eggs covering both sides and letting the extra egg drip back into the bowl.
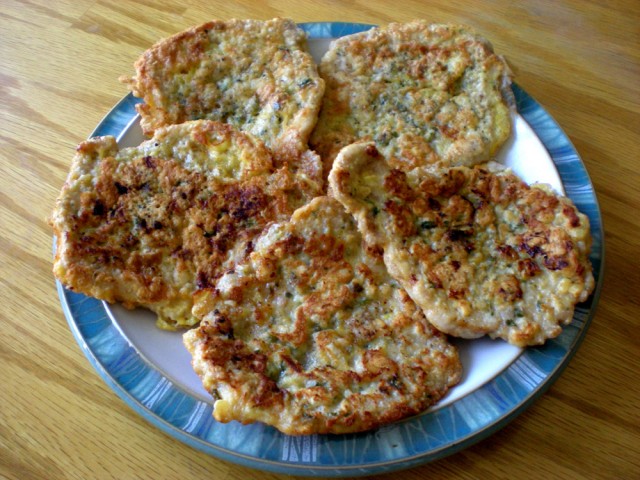
Step 9: Place the meat into the frying pan, fry it 3-5 minutes on each side. You may want to fry more or less time depending on the thickness of each piece.

Step 10: Use a fork or a spatchula to take out the meat. Continue frying the rest of the slices until you have no more meat left. If you run out of eggs, just crack 1 more egg into the bowl. If you run out of flour, just add extra 1/4 cup of flour onto the plate. Don’t forget to add oil as needed to prevent meat from burning.
Related Articles


0 Comments
Add comment
Leave a Reply
You must be logged in to post a comment.